Requirements:
- Adobe Acrobat Reader DC / Adobe Acrobat Pro installed.
- TSA Server Endpoint URL:
https://YOUR-TSA-ENDPOINT - Optional: Username & Password (if your TSA account requires authentication).
Step 1: Open Preferences
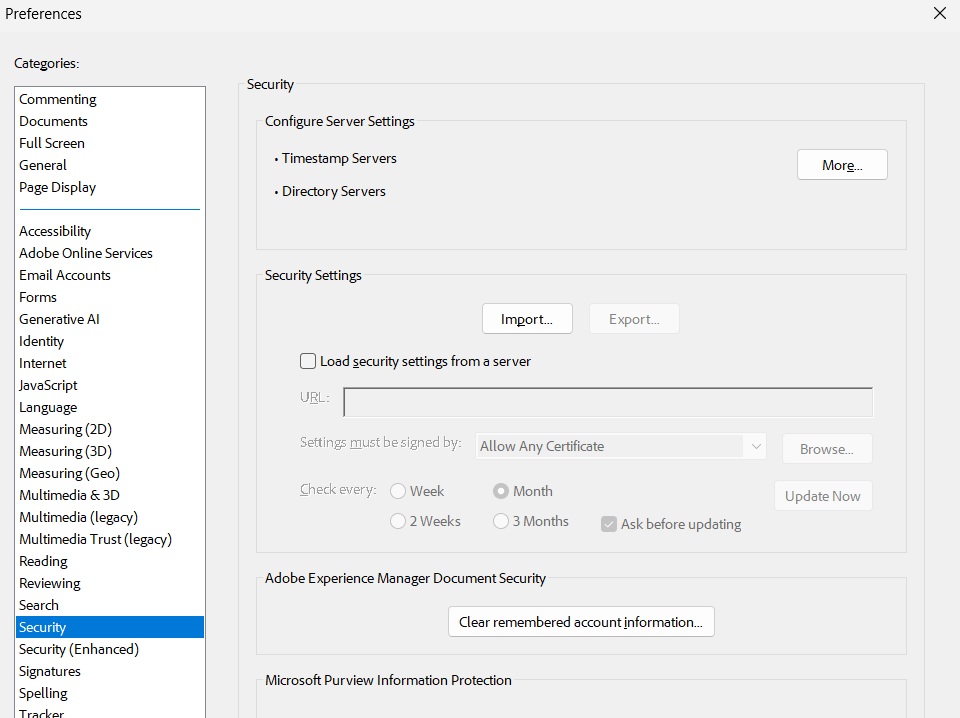
Launch Adobe Acrobat, navigate to the top menu, click on Edit, and select Preferences (or press Ctrl + K / Cmd + , on macOS).
Step 2: Access Signature Preferences
In the left Categories list, click on Signatures. Locate the Document Timestamping section and click the More… button.
Step 3: Add a New Time Server
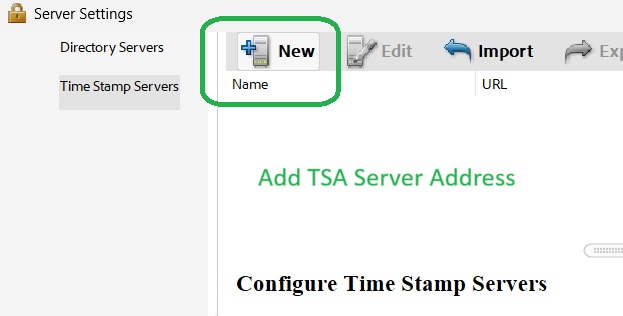
In the Server Settings dialog box, select Time Stamping Servers from the left list, then click the New icon (plus sign) at the top of the window.
Step 4: Configure Server Properties
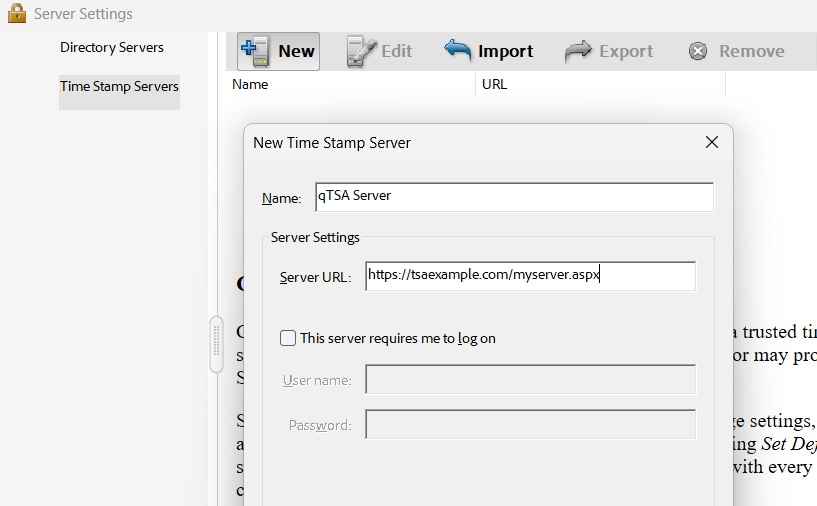
Enter a descriptive name and the exact URL of your TSA endpoint:
- Name:
qTSA Server(or your preferred server label) - Server URL:
https://YOUR-TSA-ENDPOINT - Authentication: Check “This server requires me to log in” only if your TSA subscription provides specific credentials.
Click OK to save the configuration.
Step 5: Set as Default Timestamp Server
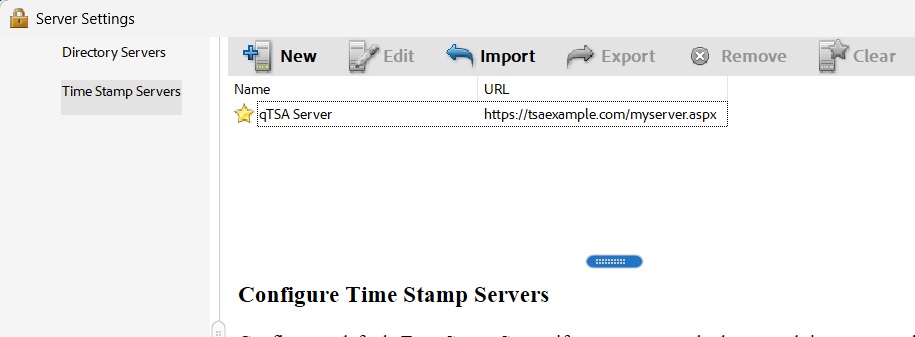
Select your newly created timestamp server entry from the list and click Set Default at the top bar. A checkmark icon will appear next to the server name.
Done! From now on, whenever you sign a document or apply a digital signature in Adobe Acrobat, the application will automatically fetch and embed a trusted RFC 3161 timestamp token directly into the PDF signature structure (PAdES format).